Apache Spark is the unified analytics engine for large scale data processing. Although it supports writing applications in Java, Scala, Python, R, SQL; Scala is preferred by many(especially by me) to develop applications due to its engine’s nativity. Furthermore, developing applications utilizing Spark on local desktop, automating build, testing and distribution can be done in multiple ways - Gradle based build automation is one of the option.
This tutorial will guide you to get started with a full fledged Spark application on local desktop with complete unit testing and build automation.
Prerequisites
-
JDK 1.8 - use jenv to manage Java Environments if required.
-
Intellij or Eclipse for Integrated Development Environment(IDE).
-
Scala plugin in case of IDE.
Build with Gradle
Gradle; an open source build automation tool expressed in Groovy is used for accelerating the developer’s productivity. Gradle wrapper is used for installing and maintaining the version stability across any environment.
Setup the Gradle wrapper using this.
Below topics will help to define the project properties through build script “build.gradle” for the application using Spark.
Managing Dependencies
-
Spark libraries are expressed as “compileOnly” dependencies as they are available in the Spark clusters where the job will be executed.
-
Other dependent libraries are expressed as “compile” which are further packaged in final application distribution.
-
Test dependencies are expressed as “testCompile”.
-
Test dependencies can extend “compileOnly” for utilizing the spark libraries.
dependencies {
  compileOnly group: "org.apache.spark", name: "spark-core_2.11", version: "2.4.5"
  compileOnly group: "org.apache.spark", name: "spark-sql_2.11", version: "2.4.5"
  compileOnly group: "org.apache.spark", name: "spark-hive_2.11", version: "2.4.5"
  compile group: "org.scala-lang", name: "scala-library", version: "2.11.+"
  compile group: "ch.qos.logback", name: "logback-classic", version: "1.2.3"
  compile group: "org.slf4j", name: "log4j-over-slf4j", version: "1.7.25"
  compile group: "com.github.scopt", name: "scopt_2.11", version: "3.7.1"
  testCompile group: "com.holdenkarau", name: "spark-testing-base_2.11", version: "2.4.5_0.14.0"
  testCompile group: "org.scalatest", name: "scalatest_2.11", version: "3.0.1"
  testCompile group: "junit", name: "junit", version: "4+"
}
configurations {
  testImplementation.extendsFrom compileOnly
}
Source Package Organizing
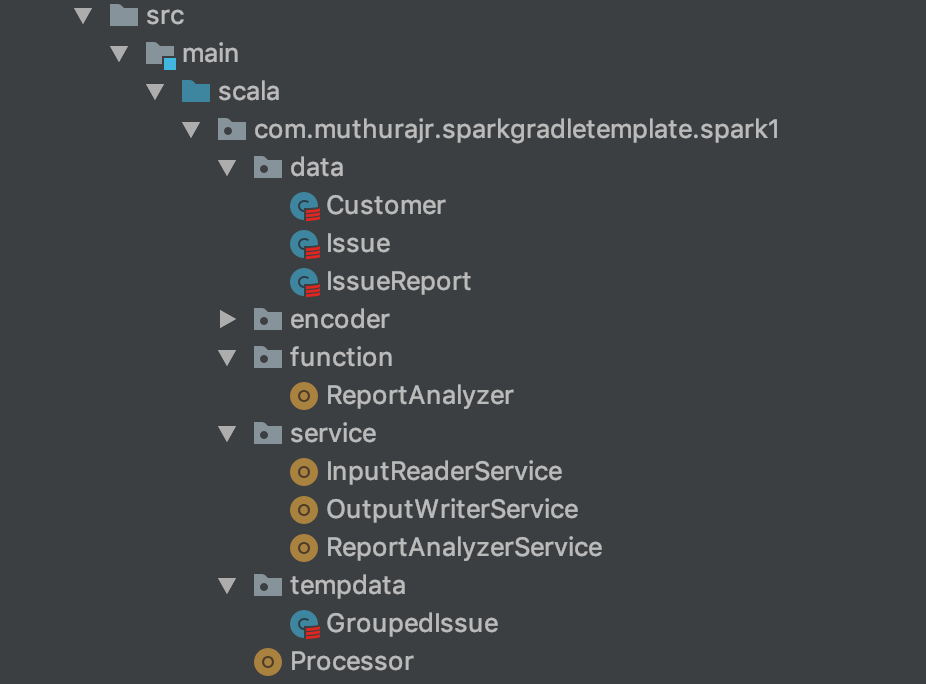
The source packages are organized as functions, services, data, tempdata and a processor.
- functions- defining all the business rules with functional approach; can be used in any framework as they are independent of Spark.
-
services - expressing the spark dataset logic with join, grouping, etc., which will utilize the functions for execution.
-
processor - the unified logic to connect various services of an application.
- data, tempdata - case classes corresponding to the data accessed.

Unit Testing
Every class implementation has its test class, and majority of its business functionality testing exists in function’s package. A sample below which utilizes the DatasetSuiteBase for SparkSession and compares the expected result at the end.
import java.sql.Date
import com.holdenkarau.spark.testing.DatasetSuiteBase
import com.muthurajr.sparkgradletemplate.spark1.data.{Customer, Issue}
import com.muthurajr.sparkgradletemplate.spark1.encoder.ModelEncoder._
import org.apache.spark.sql.SaveMode
import org.junit.rules.TemporaryFolder
import org.junit.runner.RunWith
import org.scalatest.junit.JUnitRunner
import org.scalatest.{BeforeAndAfterAll, FunSpec}
@RunWith(classOf[JUnitRunner])
class InputReaderServiceTest extends FunSpec with DatasetSuiteBase with BeforeAndAfterAll {
  var tempFolder: TemporaryFolder = _
  var directory: String = _
  override def beforeAll() {
    super.beforeAll()
    tempFolder = new TemporaryFolder
    tempFolder.create()
    directory = tempFolder.getRoot.getAbsolutePath
  }
  override def afterAll() {
    super.afterAll()
    tempFolder.delete()
  }
  describe("Valid scenario with ") {
    it("read issue") {
      //given
      val issues = spark.createDataset(Array[Issue](Issue(1, 1, "issue1", "description1", Date.valueOf("2019-01-01"), "created")))
      val path = s"${directory}/sc1/issue/"
      issues.write.mode(SaveMode.Overwrite).parquet(path)

      //when
      val actualResult = InputReaderService.readIssue(spark, path)

      //then
      assertDatasetEquals(issues, actualResult)
    }
  }
}
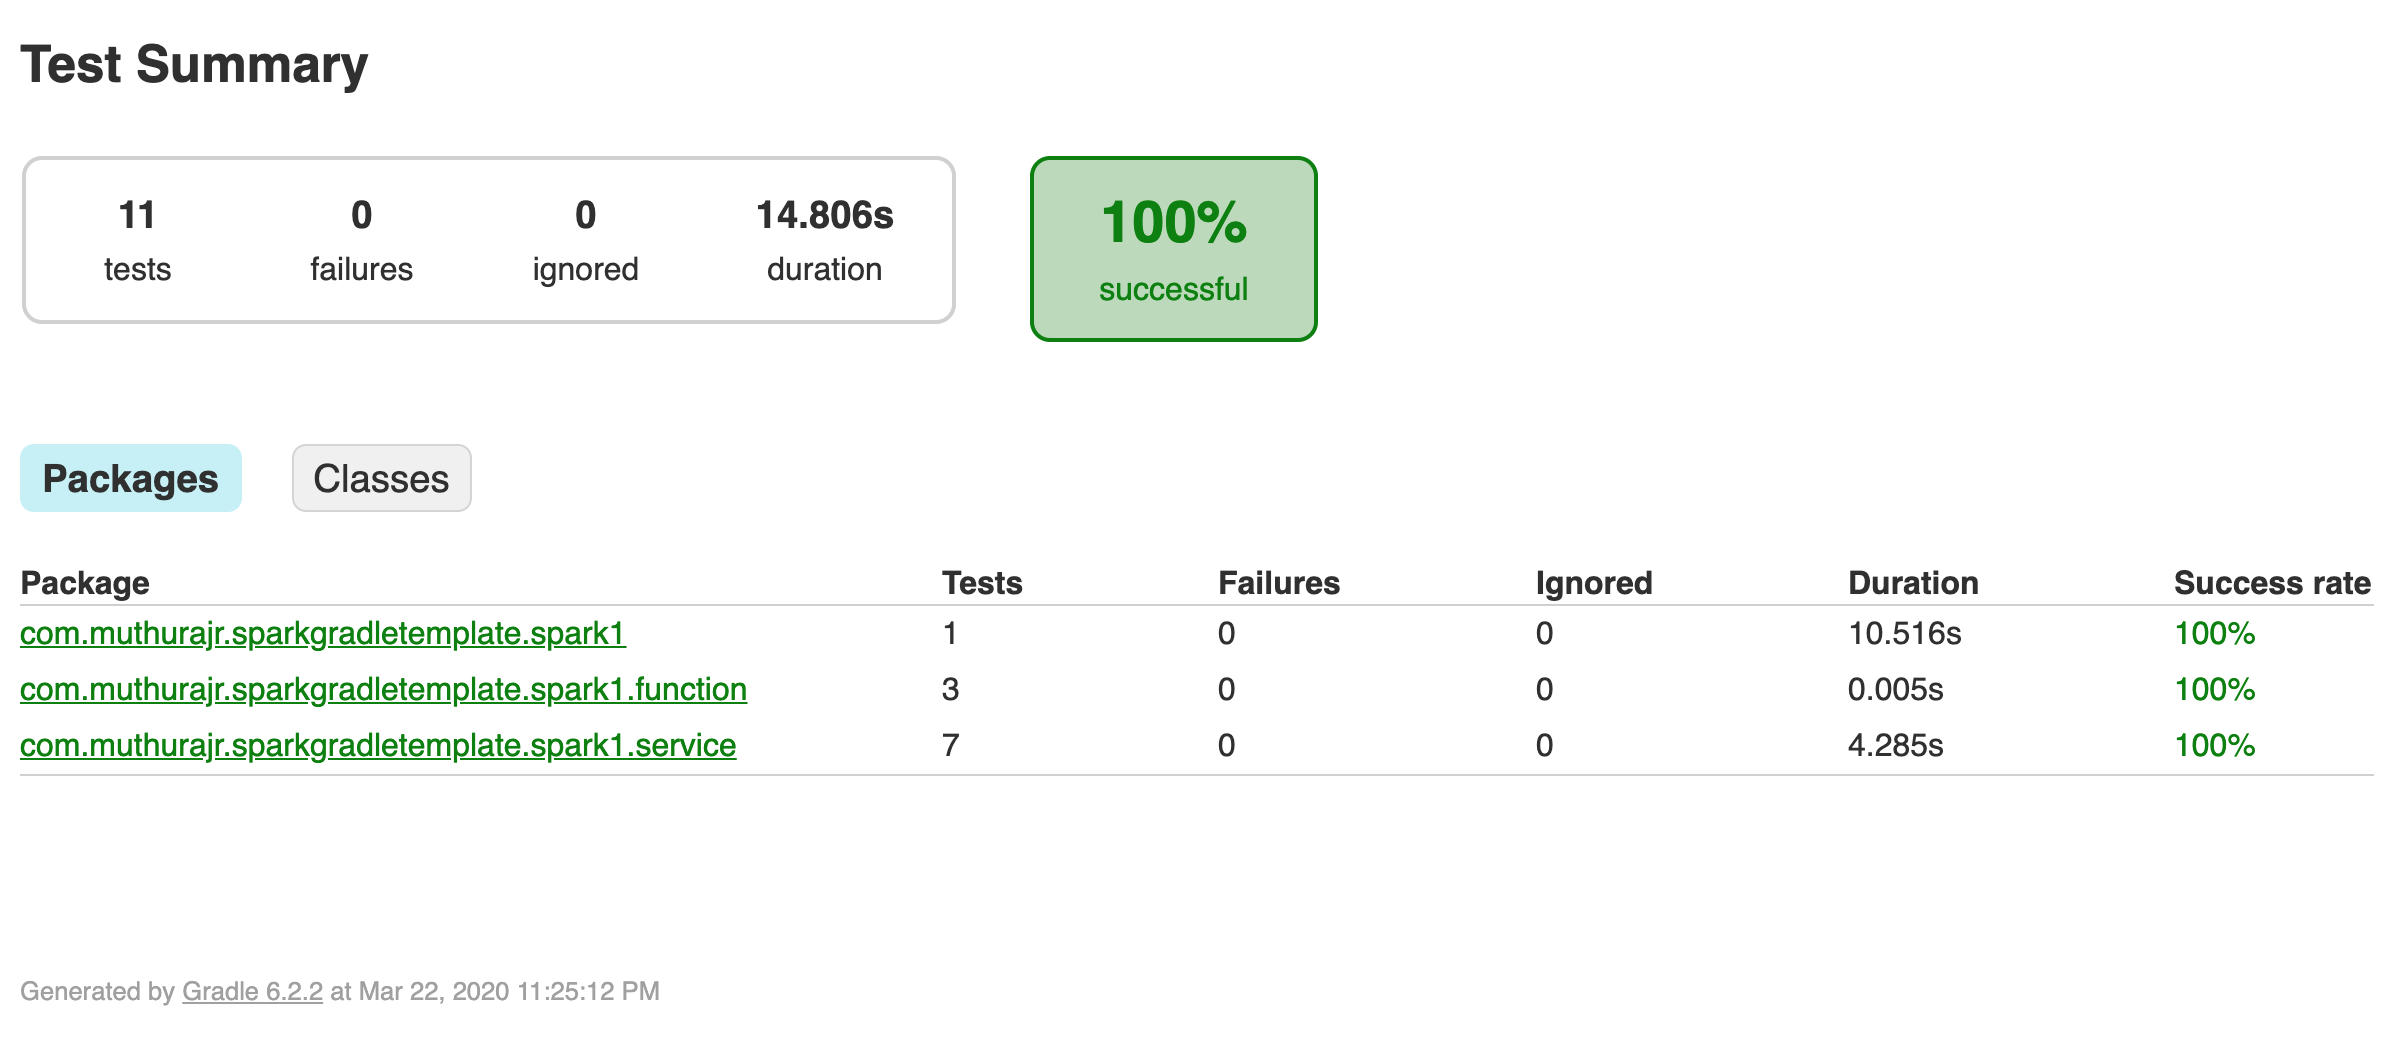
Further, when using a multi module project, the test report can be consolidated as shown below.
task testReport(type: TestReport) {
    destinationDir = file("$buildDir/reports/allTests")
    subprojects {
        reportOn { tasks.withType(Test) }
    }
}
The final test report will be:

Code Analysis Plugins
Various plugins are used to validate and maintain the stability of code. Plugins are added in “gradle/build.gradle” file and the same are extended for every submodule in the project.
- Scalastyle - to examine scala code and report potential problems based on rules defined by you.
apply plugin: "com.github.alisiikh.scalastyle"
scalastyle {
    scalaVersion = scala_version
    config = file("scalastyle.xml")   #the complete style definition
    failOnWarning = false
    sourceSets {
        main {
            output = file("$projectDir/build/reports/scalastyle/main.xml")
        }
        test {
            output = file("$projectDir/build/reports/scalastyle/test.xml")
        }
    }
    verbose = false
    quiet = true
}
- SCoverage - to examine the test coverage of the code and maintaining minimum of 95% coverage.
apply plugin: "org.scoverage"
scoverage {
    minimumRate = 0.95
    scoverageScalaVersion = 2.11
}
- Spotbugs - to perform Static Code analysis on the Scala code.
apply plugin: "com.github.spotbugs"
spotbugs {
    toolVersion = "3.1.12"
    effort = "max"
    reportLevel = "High"
    excludeFilter = file("exclude.xml")  # if any
    ignoreFailures = false
}
spotbugsMain {
    reports{
        html.enabled = true
        xml.enabled = false
    }
}
spotbugsScoverage.enabled = false
spotbugsTest.enabled = false
Binary Distribution
Creating a distribution became essential due to additional libraries used in the application. This can be achieved by -
apply plugin: "distribution"
distributions {
    main {
        distributionBaseName = rootProject.name
        contents {
            project.subprojects.each { sub ->
               into("${sub.name}") {
                   from sub.jar
               }
               into("${sub.name}/lib/") {
                   from(sub.configurations.compile)
               }
            }
        }
    }
}
tasks.withType(Tar) {
    compression = Compression.GZIP
}
Packaged .tgz & .zip files will be created in “build/distributions/” which contains the application module libraries and the dependencies.

Submodules
Submodules are a convenient way of defining more than one application module. It can be expressed with additional configurations in “build.gradle” file of the root directory:
project(":spark1"){
    test {
        maxHeapSize = "4g"
    }
}
project(":spark1"){
    dependencies{
        compileOnly group: "org.apache.spark", name: "spark-mllib_2.11", version: "2.4.5"
    }
}
Library Versions
All the library versions are controlled through “gradle.properties” file, which makes life easier to chose between different versions. An example below:
scala_version=2.11
scoverage_minimum_rate=0.95
spotbugs_level=high
project_version=local
scalastyle_fail_on_warning=false
spark_version=2.4.5
spark_testing_base_version=2.4.5_0.14.0
logback_classic_version=1.2.3
log4j_over_slf4j_version=1.7.25
scopt_version=3.7.1
scala_test_version=3.0.1
junit_version=4+
This completes your project setup and configurations. The builds can be easily automated on local or CI pipeline with the listed commands in the project directory.
- Complete build - ”./gradlew build”
- Test alone execution - “./gradlew test”
- All code analysis and validations - ”./gradlew check”
Hope you liked the Spark application template illustrated above. A complete template is available here in Github. You are welcome to collaborate!